Blue Urchin Gallery, Trentham

I'm finally back on-line after 8 weeks with a new baby! Little Miss D arrived 2 days early and she has settled into family life quite nicely.  There's not much time to do a lot these days between her and a very busy Mr J, but I have had time to get my other baby (my tea towels) into a couple of local shops in the lead up to Christmas.   
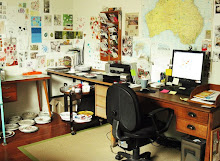
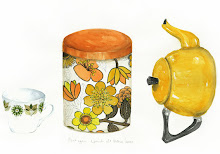
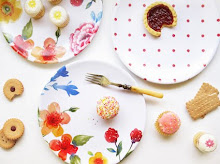
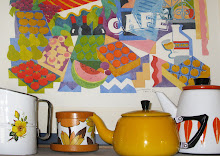
I've been lucky enough to have my tea towel collection, along with my greetings cards and the Me Old China range of jewellery selected to be a part of the work showcased at the newly opened Blue Urchin Gallery in Trentham.  
The gallery space run by Tina Lee, houses work by local and Australian artists, and is a really lovely curated selection of ceramics and ceramic-inspired products.  It's lovely to have the Me Old China range of jewellery back out on show, as it's all been boxed away since we moved house two years ago!    
In the gallery cushions with teapots sit alongside hand-thrown ceramic vessles and decorative plates, painted artwork and stoneware pots filled with herbs hang from walls, with hand-made jewellery items and children's ranges of ceramic pieces are found amongst the collection.   

Tina also runs after-school children's ceramic workshops from the studio space at the back of the gallery, including the use of pottery wheels (takes me back to ceramic lessons at school where everyone loved trying their hand on the pottery wheel - with lots of mess and without much success) great fun!
 The Blue Urchin Gallery: 37 high Street, Trentham
I'm delighted to be supported by independant and local retailers, and I'm super chuffed that Kyneton's beautiful boutique store Rundell & Rundell are now also stocking my tea towel collection, alongside their selection of hand-made and tradtionally crafted goods. The first order sold out in two weeks, but more has been added to the shop!   

I've posted about the Rundell & Rundell woodwork workshops previously, and you can see an article about the very cute shop Glen and Lisa Rundell run on The Countryfiles

Rundell & Rundell: 29 Piper Street, Kyneton   
Tea towel collection on-line


Well I'm very excited to finally get my little tea towel collection loaded onto my on-line shop.  The new baby is due any day now, and it's been a goal to get the tea towels into my shop before the little bundle of chaos arrives!
The collection comprises of 5 tea towel designs all featuring my hand-painted watercolour illustrations.  Afternoon Tea and Tea Party depict my own collection of vintage teacups and china plates, Audrey is a bright overscaled floral design, and Polly Red and Polly Blue are fun polka-dots that are cute on their own, or coordinate with the other designs.
The tea towels are 100% cotton, digitally printed and machine washable up to 40C (although cool wash and line dry is recommended) and made in England.  Perfect as a light-weight gift to send to friends or relatives in Australia or overseas!    

Big, big thanks again to Amelia from Simple Provisions for her lovely photo's and Pete from Cirkus Hair for the loan of the studio space. 

Wish me luck for my new arrival, and I hope I remember what to do with a new baby!  It might be a bit on the quiet side around here whilst I juggle a demanding toddler and wrangle with a new-born!

Tea towel range photo shoot

A few weeks ago I received all of my tea towel designs, hot off the printing press from the UK!  I was very excited to receive the designs and to have them here pre-baby - phew!  I'd been tinkering with simple packaging ideas for the tea towels but the next step was to get them photographed in order to load onto my little on-line shop, and contact potential retailers.   
I had some difficulties finding a photographer to help get the tea towels photographed, with most of the local photographers concentrating mainly on portraits and wedding photography.  Plus when dealing with a tea towel that will retail for $25, a budget for a professional photographer on top of all the other costs and expenses involved with manufacturing a small range, was pretty minimal. 
However, I was lucky enough to have an offer of help from the super-talented and very lovely Amelia from Simple Provisions to help me out with the styling and photography.  Plus, we were able to use the studio from my local hairdressers Cirkus Hair to do the photoshoot - gotta love living in a small country town with help like this!   
It was a really fun day getting the tea towels photographed, and great working with someone else who had fresh eyes and ideas for the styling of the tea towels.  I'm aiming to get the tea towels loaded into my shop before the baby arrives in two weeks time (eek!).  Big, big heartfelt "Thank You's" go to Amelia and Pete for all their help, support and time to help me out at the last minute.  Do checkout Amelia's Simple Provisions blog / facebook page as she has some really delicious recipes and delightful photography.        

The Mother Goose Treasury - by Raymond Briggs

I picked up this wonderful vintage children's book a few weeks ago at a local garage sale, and it's gone straight to the top as one of my favourite childrens illustration books!  It's a bit old and worn, but the pages are clean and undamaged and feature the most fabulous illustrations by British illustrator Raymond Briggs
The Mother Goose Treasury (first published in 1966, with my version published in 1973) is packed full of children's nursery rhymes, accompanied by Raymond Briggs' whimsical and witty illustrations. 
There are some classic nursery rhymes such as The Grand Old Duke of York, Twinkle Twinkle Little Star, Baa Baa Black Sheep etc - but there are also hundreds of ditty's and nursery rhymes I've never heard of - including some very strange ones. 
The lively illustrations are a mix of black and white sketches created with an ink pen by the look of it, and colourful painterly pieces, perhaps with watercolour? 


Raymond Briggs is probably most famous for his children's classic 'The Snowman'.  First published in 1978 it's a picture book without words, that was made into an animated film in 1982
The illustrations and the animation of The Snowman is fabulous, all hand-drawn with pastels and crayons without any digital or fancy effects, and whilst the film contains no words the music describes the scenes perfectly, and you almost don't notice there isn't any commentary. 

The story is about a young English boy who makes a snowman one Christmas Eve.  The snowman comes alive at midnight and the two share a delightful adventure before the snowman takes the boy on a magical trip to the North Pole to meet Santa Claus. 

If you have a spare 25 minutes it's worth watching The Snowman on You Tube for the animation, and also a beautiful video to watch with children - it so reminds me of my childhood as this was played every Christmas.  Just seeing the snow and the excitment of the little boy takes me back to snowy winters in England a very long time ago! 

Watercolour teacup illustrations

A few weeks ago I posted about some teacup artwork I had been comissioned to work on.  I'd been asked to create a watercolour piece for a 40th birthday gift, featuring some of the recipients vintage teacups and saucers handed down from her Grandmother.  It's been a really lovely project to work on, and very special that it was a for a significant birthday gift as well as the really personal element with the family heirloom china. 
After selecting the chinaware to use and placing it into a suitable arrangement, I started the illustration by sketching out the individual pieces directly onto Arches Smooth 185gsm Watercolour paper.  I then initially applied light washes of grey hues to the teacups, gradually building up the layers to create the shape, form and shadows of each teacup.
 
Once the shading was completed I started to paint the gold rims of each cup, followed by the detail of each cups pattern over the top of the grey shadows.  Again this was done with washes of colour, starting quite lightly and free and gradually building up to the finer details and intricate patterns.   
This is the finished illustration featuring four teacups and two saucers.  I was really pleased with the artwork, and despite being a little intimidated about painting a piece to be a framed picture and not being able to correct any mistakes on the computer, I thought it turned out quite well! 

The North Wind & The Sun - Illustrations by Brian Wildsmith

I was really pleased to come across this book at the local op-shop, because it features the wonderful lively and quirky illustrations of one of my favourite illustrators, Brian Wildsmith, who I've blogged about previously with his books The Owl and the Woodpecker and Python's Party
The book is called "The North Wind and The Sun" and is a fable by La Fontaine, first published in 1964. The fable centres around the Northwind and the Sun, and how they compete by different methods to get the horseman to remove his new cloak.  
The fable has a great moral lesson (see below) but it's the whimsical and playful illustrations that transform this story into a delightful book to look at and read.  Using a multi-media approach Wildsmith's imagery mixes gouache, some kind of crayon or oil pastel (I imagine the latter), collage and inks to create his trademark expressive illustrative style full of energy and movement. 
"The North Wind and The Sun" - A Fable by La Fontaine:

One morning the North Wind and The Sun saw a horseman wearing a new cloak. 

"That young man looks very pleased with his new cloak" said the North Wind.  "But I could easily blow it off his back if I wanted to"
"I don't think you could" said the Sun.  "But let us both try to do it.  You can try first."

The North Wind began to blow and blow and blow.  People had to chase after their hats.  Leaves were blown from the trees.  All the animals were fightened.  The ships in the harbour were sunk.  The North Wind blew with all his might, but it was no use, for the horseman just pulled his cloak more tightly around him.

"My turn now," cried the Sun.

And as he gave out his gentle heat, insects hummed and flowers opened.  The birds began to sing.  The animals lay down to sleep.  And the people came out to gossip.  The horseman began to feel very hot, and when he came to a river he took off his clothes and went for a swim.

So the Sun was able to acheive by warmth and gentleness what the North Wind in all his strength and fury could not do.

A great lesson for us all I think!

Recycled paper baby bunting

3 years ago I wrote about making some bunting out of recycled fabrics, in preparation for our first baby...... well, the time has now come to make some more bunting in preparation for our second baby (eek!) but this time I've made the bunting above out of recycled paper.
The inspiration for the paper bunting came after a visit to one of our favourite cafes Red Beard Bakery in Trentham.  Red Beard had some paper bunting which had been made from old books, and I thought it was a great idea and a perfect way to use some of the collection of second-hand Little Golden Books I'd been collecting.     
The illustrations from the books have been perfect to make the bunting and I love the vintage feel it captures.  I also like the way the mix of stories and images used aren't specifically 'girl' or 'boy' but a nice mix of various illustrations and themes.   
Here's how I made the paper bunting:
1.  Drew a triangular shape onto an old piece of cardboard - making sure the triangle would fit onto the Little Golden Books I was going to use for the bunting.  I also added on a 2cm rectangular top section to the triangle shape so I had some excess to fold over and secure to the ribbon.
2.  Cut out the triangle to make a template.
3.  Selected the Little Golden Books and tore out all the pages and illustrations I wanted to use for the bunting. 
4.  Used the triangle template to trace the shape onto the torn pages, and then carefully cut each page.
5.  Folded the rectangular top section of the triangle in half (so 1cm was above the triangle and 1cm folded to sit over the ribbon) and stuck double sided tape to the back of it. 
6.  Select the ribbon to use (I used 3 different patterns, or you could use string) and hook the folded part of the bunting over the ribbon and stick to the double sided tape to secure.  I also added some sticky-tape on the back as well to fully secure in place.
7.  String bunting up to your wall using removable hooks.
8. Stand back and admire your crafty work!

Teacup artwork

 
I've recently been commissioned to create a watercolour artwork piece featuring my favourite subject matter - vintage teacups.  It's always a little bit terrifying creating artwork for someone else, especially when the finished illustration is to be framed as an original artwork so I don't have the option of scanning into Photoshop and tweaking any bits, I can't make any mistakes!  However, I'm really pleased with how the illustration is progressing, and without giving too much away here is a little preview of the artwork in progress.  

Work in progress.....a sneak peek


In between freelance projects, housework, cooking meals and general being-a-mum-stuff, I'm in the process of trying to work on some of my own projects and adding a few things to my poor negelected little shop

I never seem to have the time to work on my own projects, and they always get relegated to the last job on the list!  I'm sure this is the same for a lot of people in a similar situation and it's very frustrating.  I'm currently reading a great book called 'The Divided Heart: Art and Motherhood'  by Rachel Power, who interviews Australian artists, filmakers, musicians and other creative women about the challeges of trying to work in a creative capacity whilst also struggling with raising a family.  The impact of this is "a divided heart; a split self; the fear that to succeed at one means to fail at the other."  Oh so very true!  Well, I actually don't think I'm quite failing at either (yet), but my own creative projects are just taking longer and longer to come to fruition. 

There are several things I'm in the process of trying to develop, but this range of tea-towels is starting to take shape and it was very exciting to receive my first set of samples last week.  It would have been great to have them ready to go for Mother's Day, but at this rate I'm hoping to have them ready for Christmas instead! 

Blue found treasures

I don't have many blue things in my house, with the exception of a stack of blue Willow plates it's not normally a colour I'm particularly drawn to.  Or maybe it's just the era of designs and patterns I like weren't really doing a lot of blue designs.  Either way, it's resulted in a distinct lack of blue things that I've collected. 

However, I picked up two blue things on the same day and thought they worked so well together.  I bought the very cute enamel blue and white polka dot teapot (I do actually have the matching enamel coffee pot in the same colour) and the rather lovely creamer featuring a stylised floral pattern in the same royal blue hues.  The ceramic creamer was manufactured by Sandland in England, it's not a pottery company I've ever heard of before but looks like they were producing designs from the mid 1940's up until the 1970's. 

Lovely to have some new blue treasures to add to my collection! 

Easter weekend treats

We're just coming to the end of a rather lovely Easter long weekend break, and I'm about to enjoy a nice cuppa with some (more) chocolate.  Easter Sunday started with Toblerone French Toast, courtesy of Bill Granger - which Mr J thought was a fantastic way to start the day, but his day brightened up even more with with a little Easter-egg hunt!  

Toblerone French Toast, Bill Granger

Ingredients: 
  • 3 eggs
  • 3/4 cup milk
  • 1 tbsp caster sugar (I left this out as it's sweet enuogh as it is!)
  • 8 slices brioche loaf (I couldn't find a brioche loaf, so I used an un-sliced loaf of fruit toast)
  • 25g unsalted butter
  • 100g Toblerone bar, chopped
Method:

  • Whisk together the eggs, milk and caster sugar (if using) into a flat dish
  • Melt the butter in a large frying pan over a medium heat.
  • Dip two slices of brioche into the egg mixture, turning them over until they are completely coated.  
  • Put the soaked brioche slices in the frying pan and sprinkle each one with a quarter of the chopped chocolate.
  • Soak another two slices of brioche in the egg mixture, and put on top of the bread in the pan to make sandwiches.  Press lightly with a spatula to seal the edges.
  • Cook for 2 - 3 mionutes on each side until golden brown.  Repeat for the other two sandwiches and serve immediately.
  • Enjoy!  

Farmhouse Home illustrations

Just before Christmas I was commissioned to create some illustrations for Catherine Bedson's Farmhouse Home blog, which is a blog essentially celebrating food. Catherine cooks delicious food and shares rustic, country style recipes, as well as doing reviews of local cafes in Melbourne and book reviews.
Catherine was looking to re-vamp her blog and wanted some hand-drawn illustrations to accompany the new design. The illustrations were to form the actual header and overall branding, as well as individual icons for the menu tabs.  The illustrations had to reflect the easy country style of her food, but also something that would capture the homely and personal feel of the blog.   
We made the decision early on to purely create the illustrations in black and white, and in a sketchy hand-drawn style.  The image above, and the following images below show some of the sketches and work in progress to get to the final illustrations. 
 
All of the illustrations were completed using a HB and B pencil, onto plain paper.  The sketchy style of the illustrations was used to convey a relaxed and homely feel, and the monochromatic colour palette helped to keep it simple but contemporary. 

One of my favourite parts of the brief was to sketch Catherine's dog Charlie - who was very cute! 

Over on the Farmhouse Home blog currently is a little interview Catherine did with me about my artistic background, and I also shared one of my favourite recipes.  Yum!  You can see it here.